 How-to
How to Remove Lawn Thatch Safely Without Root Damage
Last Updated: November 8, 2026
Quick Summary
To remove lawn thatch safely, first measure the thatch layer and only act when it is thicker than about half an inch. Work when the grass is actively growing and the soil is moist but not waterlogged, and use a rake or core aerator rather than an aggressive power rake set too deep. Lift dead material instead of slicing into the soil so crowns and roots stay intact.
- Push a finger into the turf; if you cannot feel soil under the spongy layer, it is time to dethatch.
- For cool-season grasses, dethatch in early fall or early spring when growth is fast.
- Core aeration causes less lawn stress than power raking or verticutting, per University of Missouri Extension.
- If a power rake kicks up soil or green blades, the depth setting is too aggressive.
- Water deeply twice a week after dethatching instead of light daily sprinkles.
Table of Contents
- Why Removing Thatch Wrong Can Tear Grass Roots
- How to Tell if Your Lawn Needs Dethatching
- The Best Time to Dethatch a Lawn
- Lawn Dethatching Tools and Which One Spares Roots
- Step-by-Step: How to Remove Lawn Thatch Safely
- Lawn Care After Dethatching for Faster Recovery
- Book a Thatch Assessment Before You Rent a Machine
- Frequently Asked Questions
Why Removing Thatch Wrong Can Tear Grass Roots
Thatch is the brown, spongy layer of dead stems and roots that builds up between green grass blades and the soil surface. A thin layer is normal. Too much of it blocks water, air, and fertilizer from reaching the root zone.
The trouble starts when homeowners attack a thick mat with the wrong tool or too much force. A power rake set too deep rips through the thatch and straight into the crowns and roots below. You end up pulling healthy grass out with the dead material.
A common mistake is dethatching a lawn that barely has any thatch. Removing material that is not there wastes effort and can damage healthy grass and roots.
Thatch removal is best approached as a measured job rather than a routine spring task. The goal is to lift dead material and leave living roots in place.
How to Tell if Your Lawn Needs Dethatching
A lawn needs dethatching when the thatch layer is thicker than about half an inch. Push a finger into the turf. If you cannot feel soil under the spongy layer, it is time to act.
Here are the signs to check:
- The lawn feels soft and bouncy underfoot
- Water pools on top instead of soaking in
- Grass looks thin, dry, or grayish despite watering
- Mower blades scalp the lawn because the deck sits too high on thatch
- Brown patches keep returning in the same spots
Not every brown patch means thatch. Some are disease, grubs, or drought. A diagnosis guide on why lawns get brown patches helps you rule those out before you rent a machine.
The Best Time to Dethatch a Lawn
The best time to dethatch is when the grass is growing fast and can recover. For cool-season grasses, that means early fall or early spring. For warm-season grasses, late spring to early summer works best.
Timing matters more than most people think. Dethatching a lawn that is stressed by heat, drought, or winter cold invites damage. The grass cannot push new growth to fill the gaps.
Avoid dethatching right after heavy rain. Saturated ground makes the job messier and can tear roots more easily. Wait until the soil is moist but not waterlogged.
A seasonal lawn care guide helps you slot dethatching into the right window for your grass type and climate.
Lawn Dethatching Tools and Which One Spares Roots
The right tool depends on how much thatch you have, how much stress your lawn can take, and how the tool actually contacts the soil.
Here is how the main options compare:
| Tool | Best For | How It Contacts the Lawn | Root Risk | Effort |
|---|---|---|---|---|
| Garden rake | Light thatch, small yards | Flexible tines lift debris | Low | High |
| Dethatching rake | Medium thatch | Curved steel tines pull through turf | Low to medium | High |
| Core aerator | Compacted soil, mild thatch | Pulls soil plugs, opens root zone | Low | Medium |
| Power rake | Heavy thatch, large lawns | Powered flails or tines slice and lift | Medium to high | Low |
| Verticutter | Heavy thatch, level lawns | Vertical blades cut into soil surface | High | Low |
A stiff garden rake or a dedicated dethatching rake gives you the most control. You feel the resistance and can stop before you rip roots.
Core aeration is the gentler mechanical option. The University of Missouri Extension) notes that coring causes less lawn stress than power raking or verticutting. It pulls small soil cores and opens the root zone without slicing through turf.
Power rakes and verticutters are fast, but they are unforgiving. On most homeowner machines, the blade or tine depth is set with a dial or a set of washers on the axle.
Watch out: renting a power rake without checking your thatch depth is how most root damage happens. Measure first, then choose the tool.
Soil moisture changes how every tool behaves. Dry thatch is brittle and breaks free easily, but dry soil makes roots fragile. Soggy soil lets tines and blades tear crowns instead of lifting around them.
Tool choice also depends on grass type. Cool-season grasses with creeping stems, such as Kentucky bluegrass, can recover from moderate dethatching when they are actively growing.
Step-by-Step: How to Remove Lawn Thatch Safely
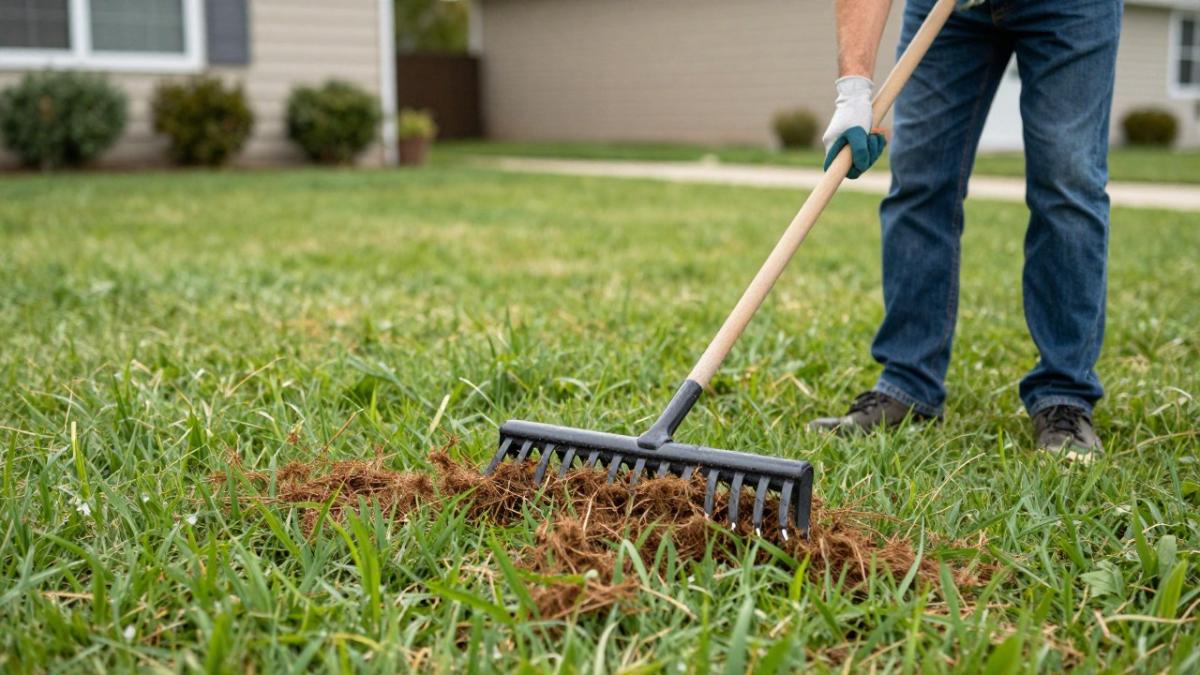
Follow these steps to remove lawn thatch without harming the grass:
- Check soil moisture. Squeeze a handful of soil. It should hold together but not drip. Dry soil makes thatch brittle and roots fragile.
- Mow slightly shorter. Set the mower one notch lower than usual. This exposes the thatch layer.
- Measure the thatch. Dig a small plug with a trowel. If the brown layer is under half an inch, stop here.
- Rake in one direction. Pull a dethatching rake with steady strokes. Lift dead material, do not dig.
- Work in sections. Do a small patch, then check the roots. If you see torn crowns, lighten your pressure.
- Bag the debris. Remove the pulled thatch so it does not smother the grass.
- Water lightly. Give the lawn a short soak to settle the soil.
If you use a power rake, set the blades shallow and make one pass. Two aggressive passes do more harm than good.
Lawn Care After Dethatching for Faster Recovery
Recovery starts the moment you finish. A dethatched lawn is stressed, and the next few weeks shape how well it bounces back. The first two weeks matter most, because that is when crowns either push new growth or fail.
First, clean up all loose thatch and debris. A spring clean-up service clears the mess and gives the grass room to breathe. Leaving pulled thatch on the surface smothers crowns and holds moisture against the soil, which invites fungus.
Then water deeply but less often. Light daily sprinkles encourage shallow roots. A good soak twice a week pushes roots down into the soil. The goal is moist soil to the depth of the root zone, not a wet surface. If water pools or runs off, you are applying too fast; split the soak into two shorter passes.
Overseed thin spots with grass seed matched to your lawn type. Keep the seed moist until it sprouts. A slow-release fertilizer helps roots recover without pushing weak top growth. Professional fertilizing targets the root zone at the right time. Hold off on high-nitrogen fertilizer until you see new growth, because pushing top growth on a stressed lawn drains the reserves the roots need.
Skip heavy foot traffic for a week or two. Give the turf time to knit back together.
A Recovery Timeline You Can Check Against
Use these checkpoints to decide whether the lawn is on track or needs a different response:
- Days 1-3: Soil should be moist but not soggy. Pulled areas look ragged; that is normal. No fertilizer yet.
- Days 4-10: Look for new green shoots at the crowns in thinned patches. If crowns are brown and mushy, the damage was mechanical and those spots may need reseeding.
- Days 10-14: Tug gently on a few crowns. Resistance means roots are anchoring. No resistance means the crown is dead.
- Weeks 2-4: Thin spots should be filling in. If bare soil persists, overseed again or consider patching with sod.
Reading the Symptoms After Dethatching
Color, texture, smell, and patch shape tell you what is happening before you spend money on treatments:
- Grey or silvery blades: Often temporary stress or dull mower blades tearing leaf tips, not always disease. If the grey is a fuzzy growth you can rub off, that is fungus.
- Yellow patches that spread: Likely fungal activity in wet, thatchy conditions. Improve airflow and reduce watering before reaching for a fungicide.
- Brown, mushy crowns: Mechanical damage from the dethatcher. These spots will not recover and need reseeding.
- Musty or sour smell: Waterlogging or fungal growth. Let the surface dry before watering again.
- Circular or irregular dead patches with defined edges: Often disease; a diagnosis from a local extension service is preferable to guessing.
When to Reseed, When to Wait
Reseed when you can see bare soil and the surrounding grass is actively growing. For cool-season grasses, that usually means early fall; for warm-season grasses, late spring to early summer. If the lawn is still stressed, wait. Seed planted into a stressed, wet lawn is more likely to rot than sprout.
Watch out: watering more to "help" a grey or yellow lawn after dethatching can make fungal problems worse. Check soil moisture with your finger before every watering, and let the top inch dry between soaks.
A clear timeline and symptom check can help you avoid overwatering, overfertilizing, or reseeding too early. If you would rather have someone read the lawn for you, contact Lover’s Lawn Services LLC for a thatch assessment.
Book a Thatch Assessment Before You Rent a Machine
Renting a dethatcher is easy. Knowing whether your lawn actually needs one is the harder part. The wrong call costs you a weekend and can set your grass back a full season.
Lover’s Lawn Services LLC can help you decide whether your lawn needs thatch removal before you rent a machine. See our full list of professional services to learn more.
Thatch removal is one of those jobs where a little knowledge saves a lot of damage. If you are not sure how deep your thatch runs or which tool fits your lawn, let a trained eye look first. Lover’s Lawn Services LLC brings eco-friendly practices, state-of-the-art equipment, and a 100% satisfaction guarantee with a 3-day refund policy to every visit. Get started with Lover’s Lawn Services LLC and give your grass a healthier root zone this season.
Frequently Asked Questions
Can dethatching damage or kill grass?
Yes, if you remove thatch that isn't there. Dethatching a lawn with little thatch can pull up healthy grass along with it and tear roots directly. The risk rises with aggressive power raking on thin turf. Test thatch depth first: push a finger or trowel into the sod. If the brown layer is under half an inch, skip mechanical removal and consider core aeration instead, which causes less lawn stress than power raking or verticutting.
What is the safest tool for dethatching a lawn?
A garden fork or a manual dethatching rake is the safest starting point for small lawns, because you control the pressure and can stop the moment roots start lifting. For larger yards, a core aerator removes soil cores and relieves compaction with less tearing than a power rake. Coring generally causes less lawn stress than power raking or verticutting. Whichever lawn dethatching tool you pick, run it on dry turf and make one pass only.
How do I know if my lawn has too much thatch?
Cut a small square of turf with a trowel and measure the spongy brown layer between the green blades and the soil surface. More than half an inch means thatch is blocking water, air, and fertilizer from reaching the root zone. Other signs: the lawn feels bouncy underfoot, water beads on top instead of soaking in, and grass dries out fast in heat. If you find less than half an inch, your lawn does not need dethatching at all.
How do I help grass recover after dethatching?
Water deeply right after dethatching so the exposed root zone rehydrates, then keep foot traffic off the lawn for about a week. Overseed thin patches with grass seed matched to your turf type, and apply a slow-release fertilizer once new growth appears rather than immediately. Mow at your normal height but keep the blade sharp. Watch for brown spots or fungus in the first two weeks; saturated ground and open turf create ideal conditions for fungal disease, so water in the morning and avoid soaking irrigation at night.